If you have started streaming or producing videos of live events recently, then you are probably familiar with the ATEM Mini. It is a compact, simple video production switcher which can easily handle 4 video inputs.
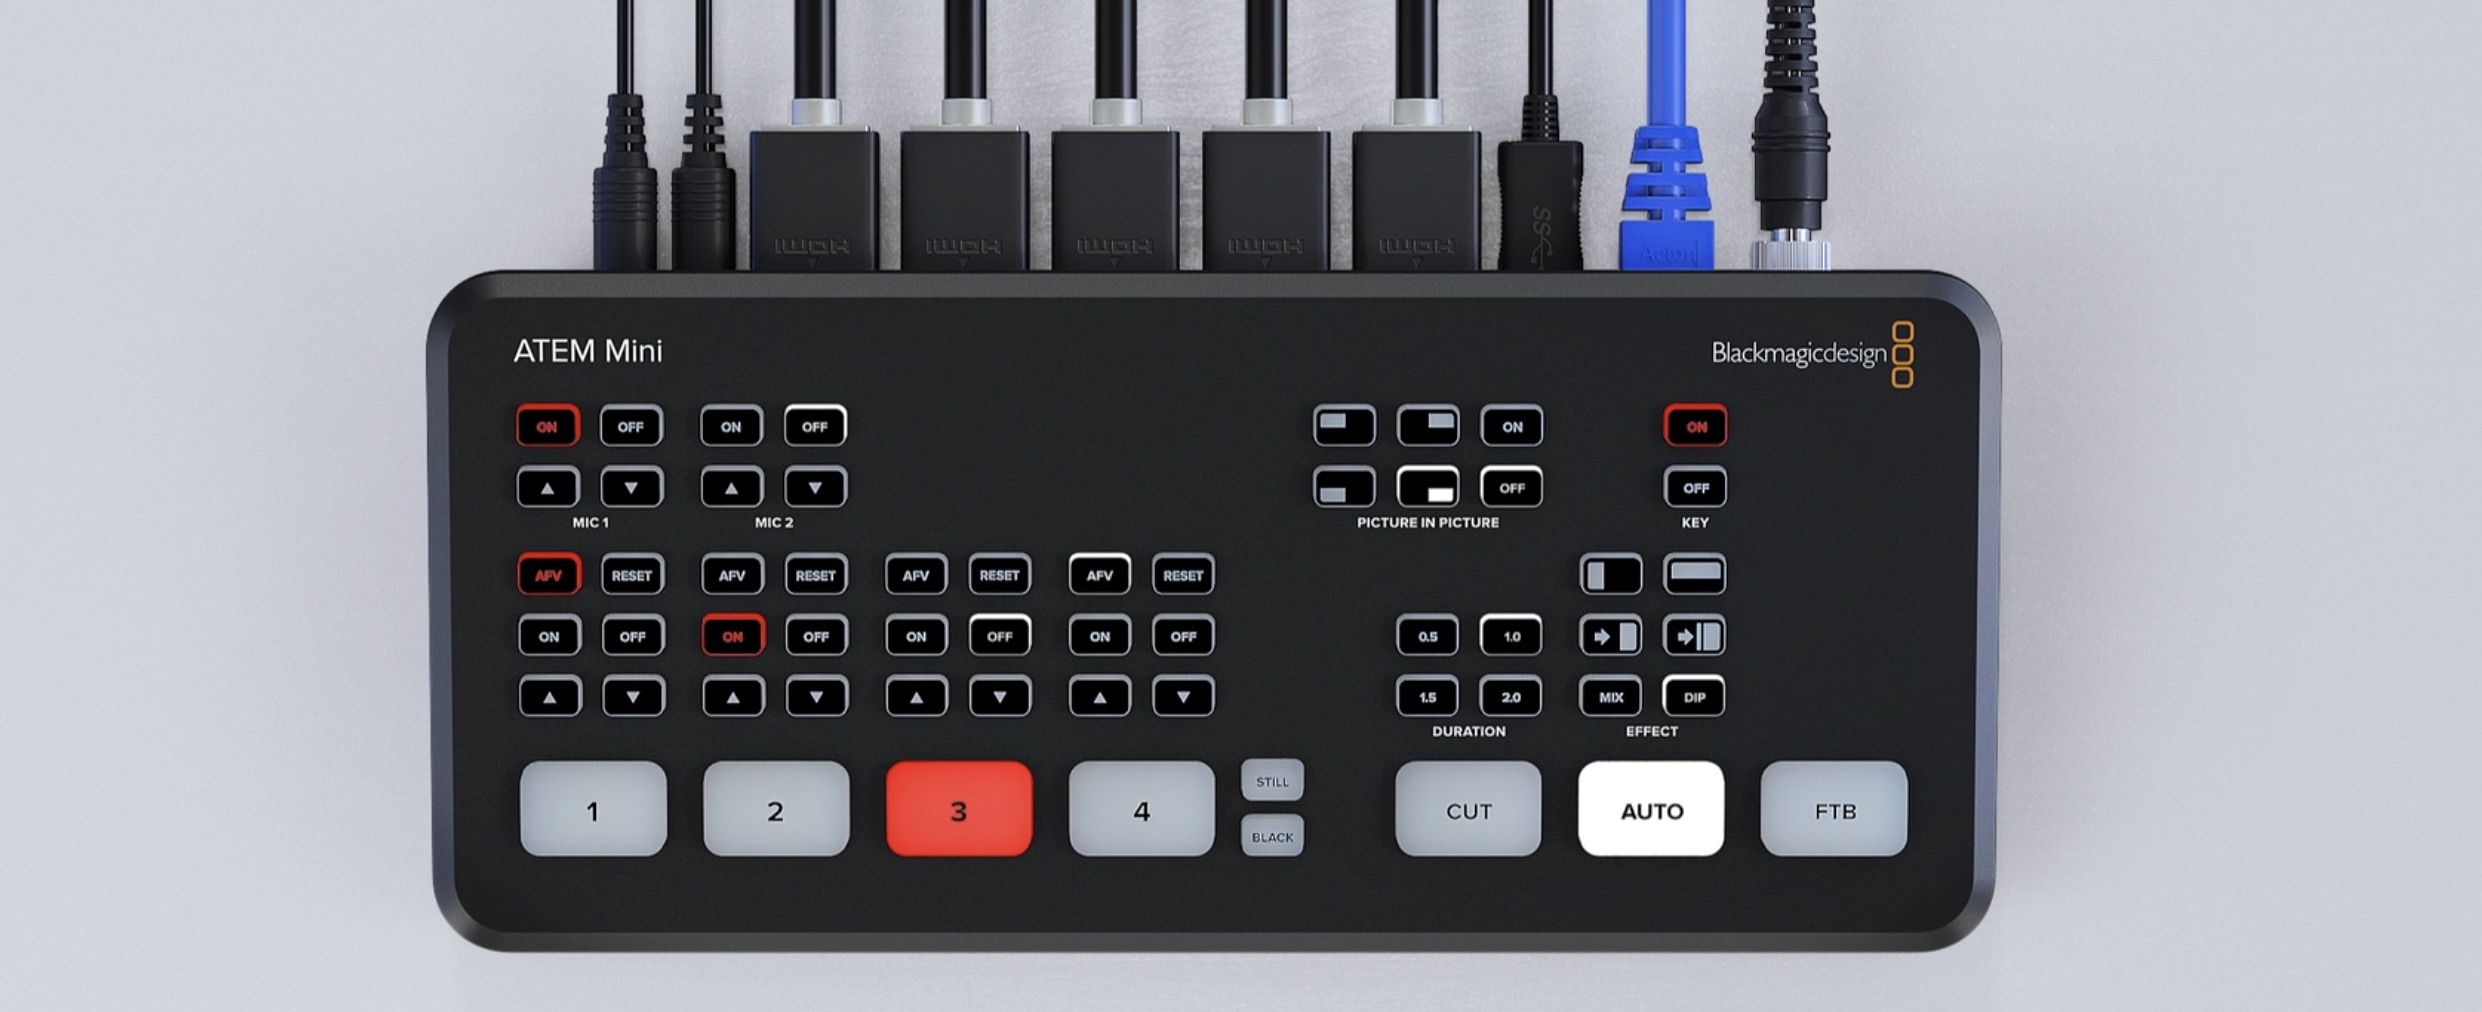
However, once you want to get past the basics which you can control with the buttons on the device, you will discover that it is only possible with their (free) ATEM Software Control. There is alot which you can control, like the source and size of the PIP (picture in picture) functionality. The dissapointment comes when you realize that the settings (like size) are lost when you press the PIP button on the switcher the next time.
This is where I discovered Macros
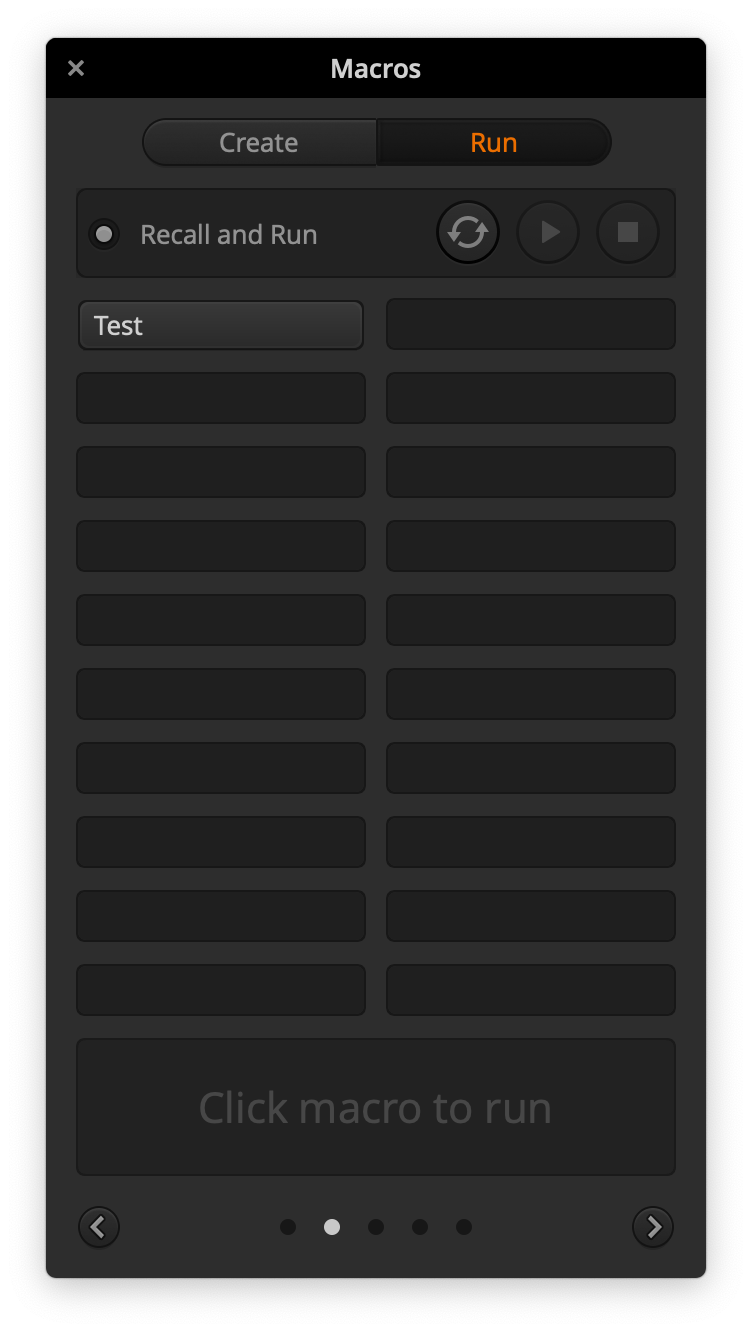
You can record macros by clicking on different buttons or changing settings in the ATEM Software Control. All changes are applied at once, unless you add a pause (a number of frames). Once you have created a macro, you can click to “recall and run” it via your computer attached to the network executing the macro (which is stored on the device itself).
However, it this way of creating macros involved quite a bit of trial and error, deleting macros, and re-creating them.
What if you want to edit your macros?
So if you save your settings in the ATEM Software Control, you can save everything OR just the macros.
- Save the macros, they get saved to an XML file.
- You can view and edit the macro in the XML file you saved.
- You can restore the XML file in the ATEM Software Control - to update or create the macros.
So create a macro, click around to get all the commands, maybe even in the order you need, then open it in a text editor!
So if you want to create a macro to setup a scene where you show the speaker, along with the projector in a PIP window, then you would want these steps:
- Set the PIP Camera to “Camera3” - in my case the projector
- Set the size and position of the PIP you need
- Wait 1 Frame for the settings to adjust
- Turn on the PIP
- Set the primary Camera to the Speaker (“Camera1”)
Here is an example:
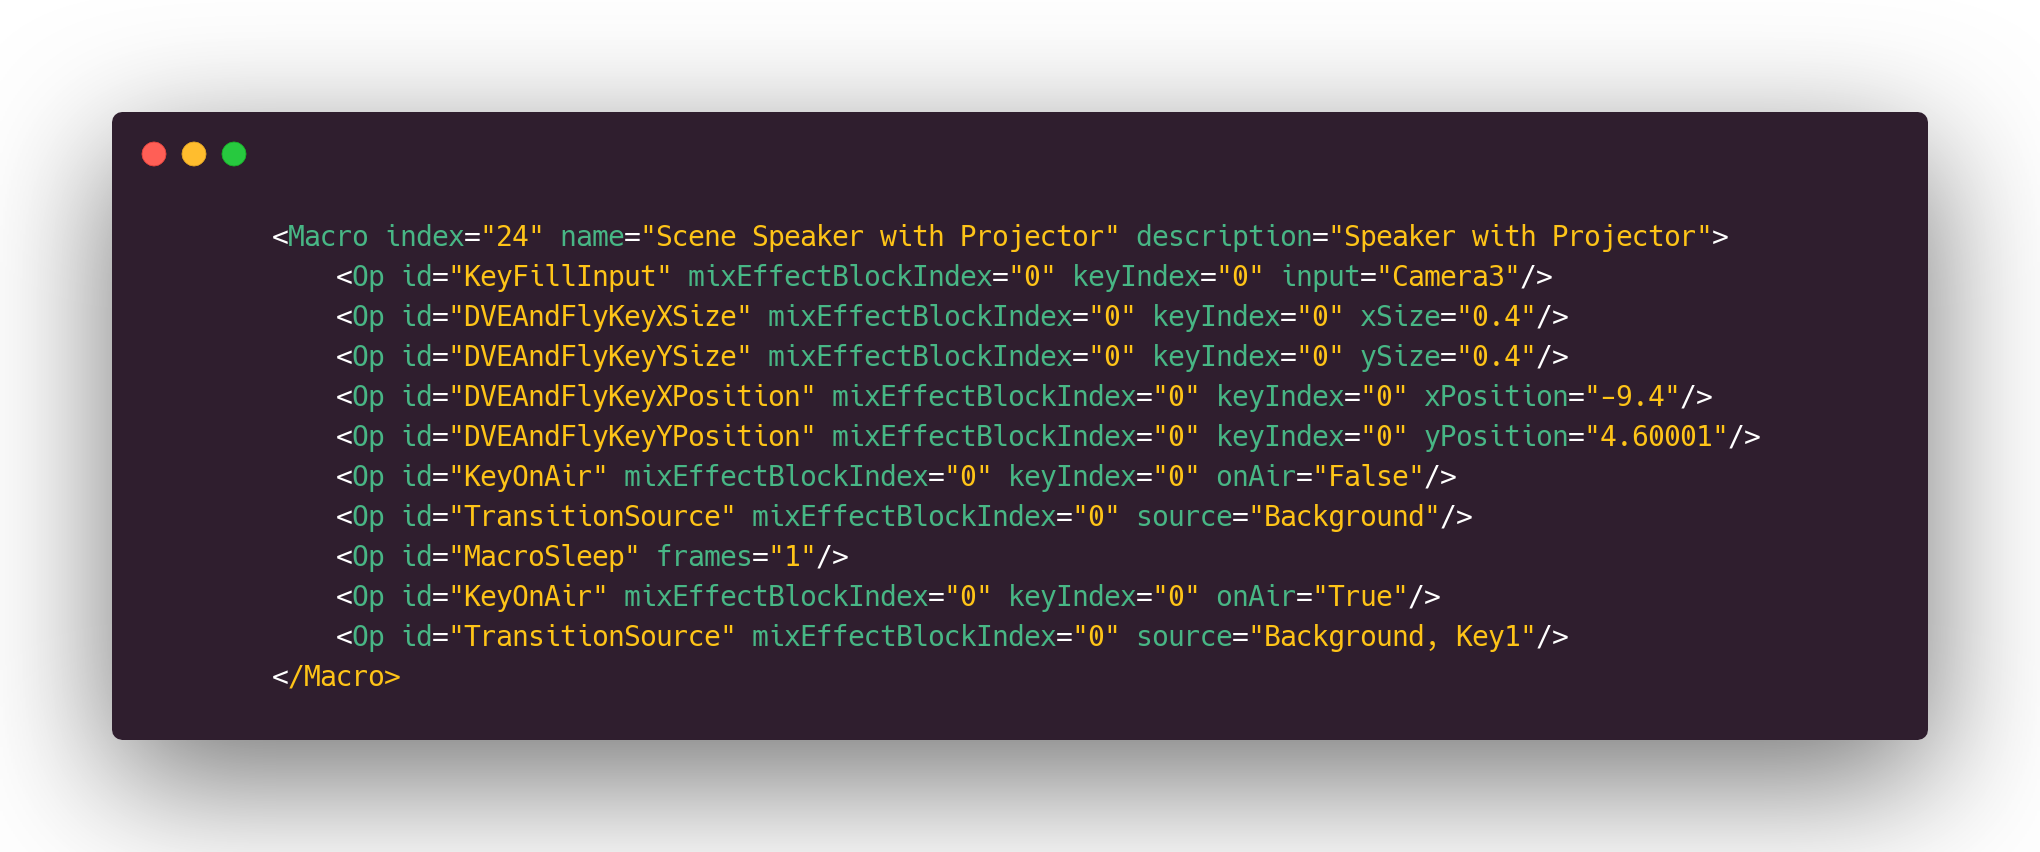
Now you have your macro which adjusts the size and postition of the ATEM Mini PIP (Picture in Picture) along with showing the correct camera!
Coming soon… how to use the Elgato Streamdeck to run macros on your ATEM Mini and ATEM Mini pro when you click a button